
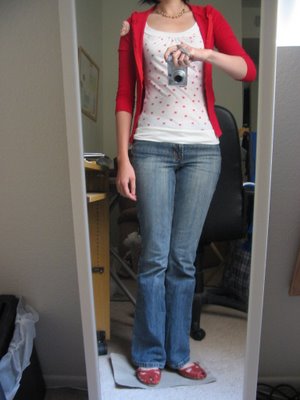
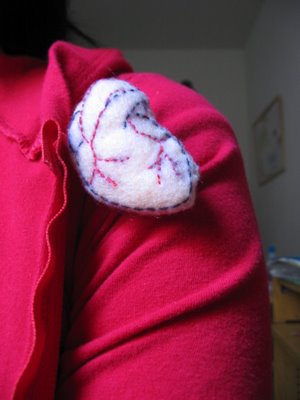
 I have a very perverse way of procrastinating: when I don't want to do work, I don't want to sit around doing nothing. I didn't want to read about how the Uniform Commercial Code treats liquidated damages, so I ended up doing arts and crafts. I saw a felt heart pin that I thought was oh-so-cute, but probably a little too cute for my age. The idea remains intriguing, so I made my own anatomical heart pin. That anatomical heart idea had been in my head for quite some time, but I was looking for an excuse to execute it.
For those of you who are dipping your toes in DIYland, felt is ideal for a beginner's project. It's stiff enough to hold its shape for easy cutting and sewing, but pliable enough to be molded into a number of things. It's not too expensive, either; I got a few large square sheets for about 50 cents each a good few years ago to make ballet slippers for a tooth fairy costume (yeah, I was too cheap to go out and buy a pair of shoes). It was the leftovers that got used for the heart pin project.
Here's a simple how-to. I didn't take pics to document the process because my camera was not cooperating.
1) Fold a piece of felt in half.
2) Find a picture of something you want to make a pin out of, be it a heart, a shoe, etc.
3) Use a pen to draw the outline and details, but don't mark it too dark.
4) Now it's time to cut out the shape. Hold the two sides together because you're going to cut out 2 identical pieces. Don't cut exactly along the outline--leave about a centimeter of space between the outline and where you actually cut. This extra space is needed because the two sides have to be sewn together.
6) Stitch over the lines you drew. This is simple enough.
7) Sewing the pieces together. There's the easy way and the hard way.
a) The easy way:
-Sew halfway in between the edge of the felt piece and the outlines of your shape.
-When you're about 3/4 done, stuff it. I used bits and pieces from 2 cotton balls. Pack it in with a pen.
-Proceed to sew the rest close.
b) The hard way:
-You'll need to cut out some darts so that the final product won't look distorted. Don't cut too deep--stop a little bit short of the drawn outline. The curviness of the shape dictates how many darts you need: the more curves, the more darts needed.
-Turn the pieces over so that the "wrong" sides are facing out. Do your stitching right below the tip of the darts. Proceed to sew this way until you're 3/4 done. Flip the piece so that the "right" side is back out again. You now get the chance to assess how good a job you've been doing.
-Stuff with wads of cotton. I pulled apart two cotton balls and just stuffed everything inside with the help of a pen.
-Close up the puffy contraption. This is the hardest part of all--you want to stuff the edges inward and find a way to stitch it close. I'm still looking for the least ugly way to accomplish this. Try to do your best to keep the shape as you're sewing it close (you can tell where I started getting in trouble).
8) Sew a safety pin on the back. Make sure you sew down the side that doesn't pop out. It doesn't take all that many stitches to get the job done, but make sure the pin stays put and hidden behind the puffy piece.
Done!
The hard way took me an hour or so. The whole project took a couple of hours to conceive and finish, including thinking time.
Now I'll finally get that reading done. I mean it!
Have fun!
1 comment:
I love that pin and it's not too young for your age whatever that maybe!
I have a friend who is in her 40's and she's a role model for dressing. If you don't dress cutsey or like an adolecent then putting a little something unexpected into an outfit works.
Post a Comment