
Now I finally have the time to do it, though not necessarily the right words.
I had to replace the lining because there were stains and holes in it. There was no way I could have used the bag without the lining because the bottom was sticky, and I didn't things poking at the cutout portion and cause damage. Removing the old lining was easy--just snip off the thread here and there, and the entire thing pulls apart. The rest was a challenge, to say the least. In retrospect, I don't recommend anyone doing this without a sewing machine unless you're patient and can handsew really well. I got the job done, but it was so frustrating that it's almost not worth it. Still, I'm making this crash course available for any of my sewing-machine-less cohorts who would like to try it.
The first thing I had to do was to find the right fabric for the lining. I went to the FIDM scholarship store because their fabric is a dollar per yard, and there is a great selection. There was a few bolts of yellow fabric, but I wanted something that was suitable for a lining, preferrably something more durable than the original cheapy plastic lining. I consulted with one of the students who worked there, and she directed me to this beautiful yellow fabric--shiny on one side, dull on the other, and the fabric was tough stuff. I bought a yard and couldn't wait to get started. A yard of fabric seems like a lot, but for someone who hasn't been trained in the fine art of sewing and have no sewing machine, it's just enough for me to mess up a few times with.
I wanted to do as little cutting and sewing as possible, so I decided to get the fit of the bag by doing this:


 The lining would be the bag within a bag--I would sew it so that it's just big enough to fit inside the red bag. To measure, I just used the red bag as a mould. Obviously the accuracy would have been better had I took actual measurements, but I wanted to get things done faster. I used a pencil to trace the outline of the bag so that I know where to sew. I wanted the shiny side to show on the inside of the bag, and I also wanted to hide my ugly seams. So, I did the markings on the shiny side so that I can sew along the lines, then flip the lining bag inside-out.
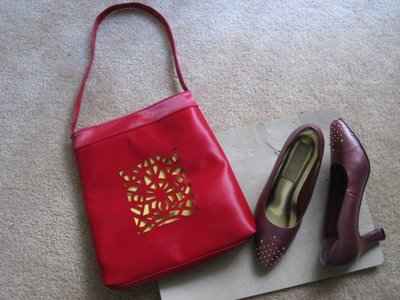
It's very important to get this "measuring" part right, because if you're off (especially where the lining attaches to the main bag, all that sewing will go to naught. This is exactly what happened with my first attempt. As it turns out, the top of the lining bag was too narrow. I didn't find out until after I've finished sewing the lining bag. Oops. I ended up turning it into a shoe bag:
Pretty? Yes. Getting there? Not so much.
Anyway, back to the prepping-to-sew part. It's not like we're just sewing two pieces of fabric together and we're done, because this particular bag is not flat. The bottom of the bag has depth, which means the lining has to follow suit. For the bottom corners of the bag, I decided to do what I'd normally do when I wrap gifts, only this time I'm wrapping the fabric around the red bag (the edges of the fabric are on the sides of the bag). Once I folded the corners, I made a few stitches to keep the corners in place. Only then did I take out the red bag.
 For the next couple of hours, I just sewed upward along the lines, starting from the bottom corners. Not all that hard to do, just time consuming. When I finally got to the top, I wanted the top edge to look pretty, so I folded it over and sewed some more:
 I flipped the lining bag inside-out. Now it's Easyland no more. Sewing the lining onto the red bag was really cumbersome. It didn't help matters that I tried to be creative and wanted the stitches to be blue (so that all three primary colors would be there).
I started at one edge of the red bag, threading the needle through holes created when the old lining was sewn in. Then, I threaded the needle through the lining. Up and down we go...where it stops, I really wanted to know. It felt like it took forever, especially toward the end, when one hand was stuck in between the lining and the bag.
 In the beginning, my stitches were much more meticulous, but as you can see, I sorta gave up toward after a while and just wanted to close it up without regard for aesthetics (the bottom right is markedly better than the bottom left). After all, no one will pay close attention to the inside of my bag. I got the job done eventually, but I can't say I'm too happy with my work. I am, however, happy about the fact that the bag is useable once again.
3 comments:
You are an incredibly pracical person: most people wouldn't even THINK of replacing the inside of a bag. They'd just call the bag old and buy a new one.
In the olden days I suppose people were more like you. They thrifted and economized and made the very most of what they have.
I think you've got the right idea, definitely.
Your blog is v interesting so I'm bookmarking it on mine.
You're welcome to drop by - though please be warned mine is very different from yours.
All the best now,
I'm at gledwood2.blogspot.com
See you there,
Gledwood
Thanks for the compliments. I'm not nearly as frugal as people who have come before me, but I try to be.
Good luck with your goal of coming out on the better side of things. Life is never easy, but we live and learn.
Clever, patient woman!
Post a Comment